
Your book is published; you need it to start selling it. Maybe you have heard of the Amazon A+ content but don’t know what to do next. In this step-by-step tutorial, I will show you how I set up my A+ Content using Canva.
Amazon took away the look-inside feature for low-content books in 2022. The best way to let customers see our book is through the A+ content page. It shows up about midway down the page under “From the Publisher”. This is where we can show our potential customers what our book has to offer.
Step 1 Log into Your Amazon KDP account
The first thing we need to do is to log into our Amazon KDP account. At the top of the page, click on marketing, go to A+ Content, and choose the main market you sell in. In my case, that is the United States, so I click on Amazon.com. The yellow button below the marketplace tab should have lit up, it says Manage A+ Content, click on it.
Step 2 Start Creating A+ Content
You should be in the A+ Content Manager now. On the right-hand side, click the blue button that says Start Creating A+ Content. Fill in the title of your book under the content name. You should see a button in the middle of the screen that says “Add Module”, click on it. Here you will see several templates to use for your product display. Choose the one you like and add it. You can add up to 5 modules. I usually use 3. I don’t want to make the page too long for customers to scroll through. Once you have added your modules, you can see what size pictures you can upload. THIS IS VERY IMPORTANT FOR FREE CANVA USERS since you can not resize your image in the free version. Write down the size of the image you need and open up a new screen to log into Canva.
Step 3 Go to Canva to Create Your New Design
Go to Canva and log in. If you do not have a Canva account set one up it’s free! If you would like to know more about Canva, click here, I am happy to explain the pros and cons of using Canva free vs. pro for your low-content books.
Now that we are logged into Canva click on the button in the top right-hand corner that says Create a Design. Be sure to put in the correct image size from the Amazon Module you choose to use. Free users can not resize their images.
Step 4: Design Your Image
- I like to make my books look real. I choose a background or make one of my own. When using the free version, if I didn’t find a free background I liked, I would get ideas from the paid products and create them myself with the free stuff.
- Use the tabs on the left-hand side and scroll through until you find backgrounds. Look through them to find one you like. If it has a gold crown next to it, that is for the paid version. Unfortunately, there is no way to filter the paid from the free. I used the Black Textile as my background in this image.
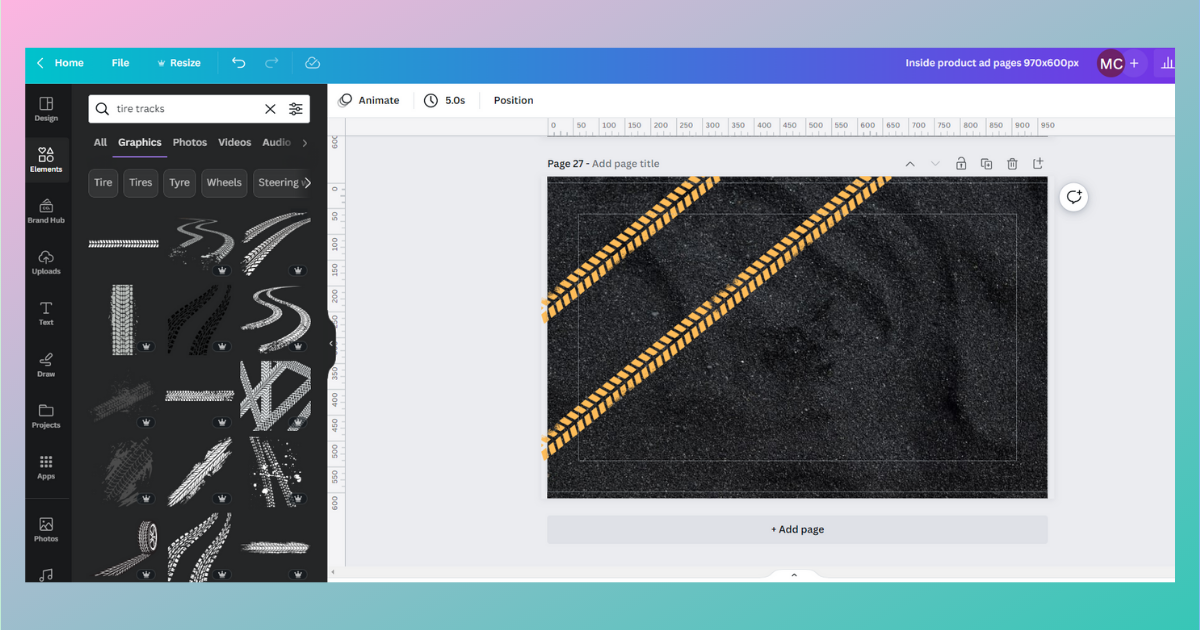
- Use graphics if your background is plain. On the left-hand side, scroll to elements near the top and type what you want to use in the search. In my case, I searched Tire Tracks. Click on the“see all” Once you find an image you like, click on it to add it to your page. Clicking on the image once in your creation will allow you to edit it, rotate it, duplicate it, and more. Add all the graphics you want.
- Now we want to add images of your book. A word of CAUTION. Do not use screen clips of your book; download the pages you want customers to see as a png. This is because screen snips reduce the pixels, and Canva free also reduces pixels. It will cause blurry pictures for your KDP A+ Content.
- Once you have downloaded images of your book, on the left-hand side of Canva click upload. Your images will appear and be ready to use.
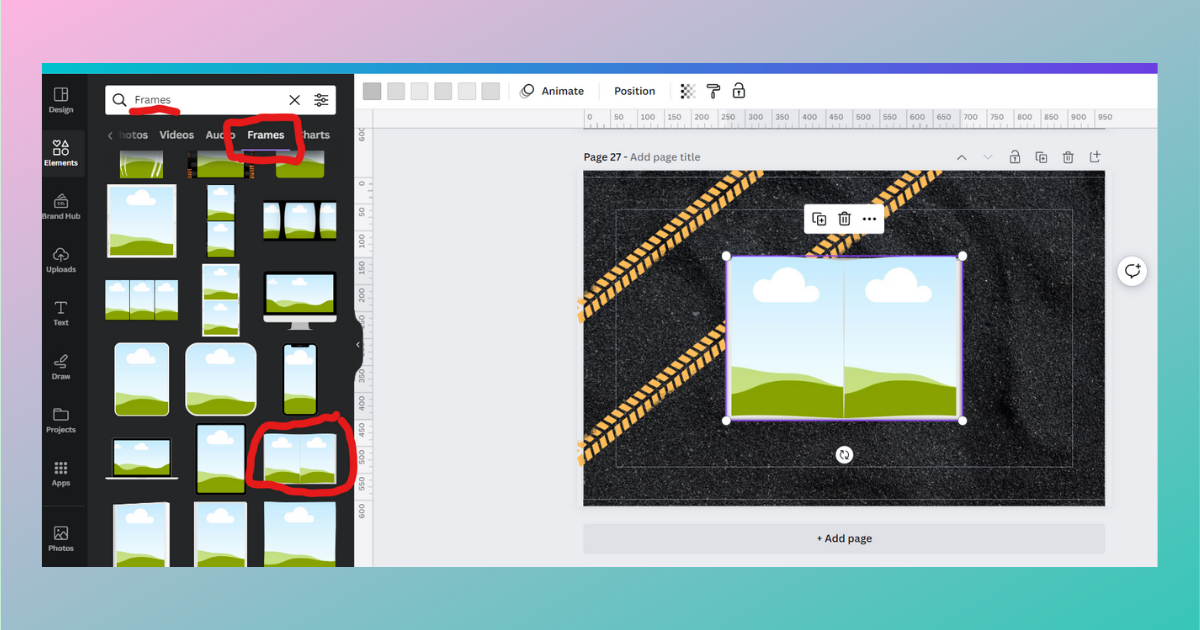
- Go to the elements tab again and search “frames” Be sure to click on frames under the search box. You will have to use the toggle on the right to find it. Scroll until you see the picture below. It looks like an open book. I apologized for Canva’s search bar. It’s not always the best, but once you find the frame, star it so you can always find it again.
- Click on the image of one of your pages. It will appear on your design, drag and drop it into the book frame. Here, I have added 4 open-book templates a filled them with my page downloads.
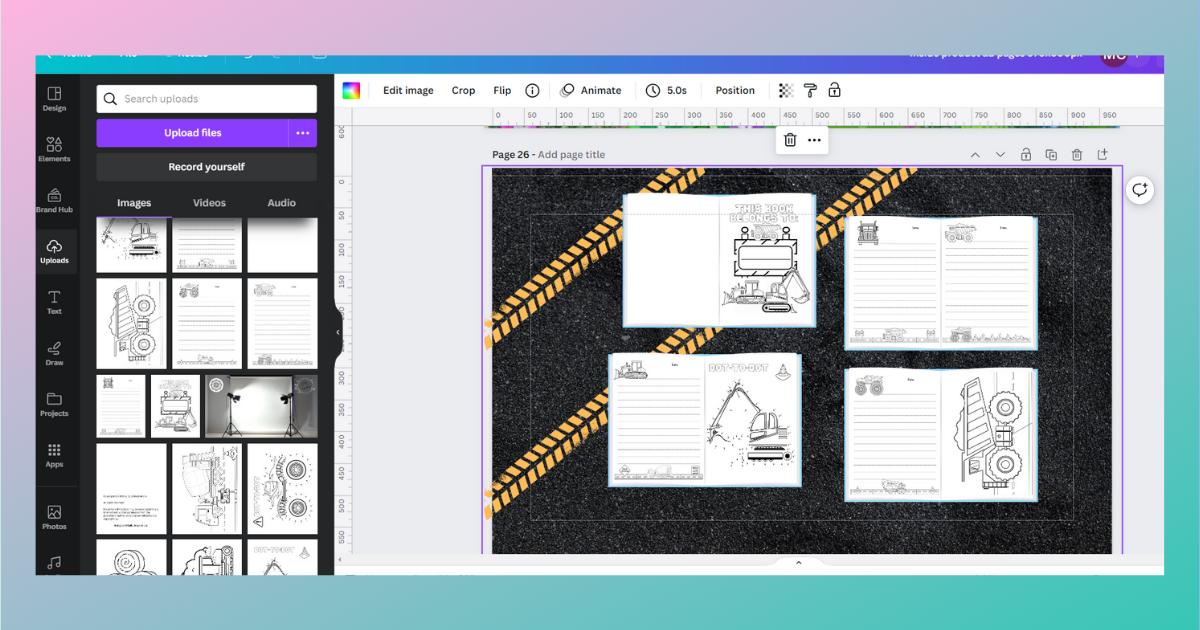
- Now you can move them around until you like the way they look in your project.
- Let’s add text boxes unless you would like to add the text in the text section of your Amazon Module. I like it in my image. Go to the left-hand side and scroll to the text box. Here you can pick out the style of text you would like. Insert your text box, type your description, and move it around the page until it’s where you want it.
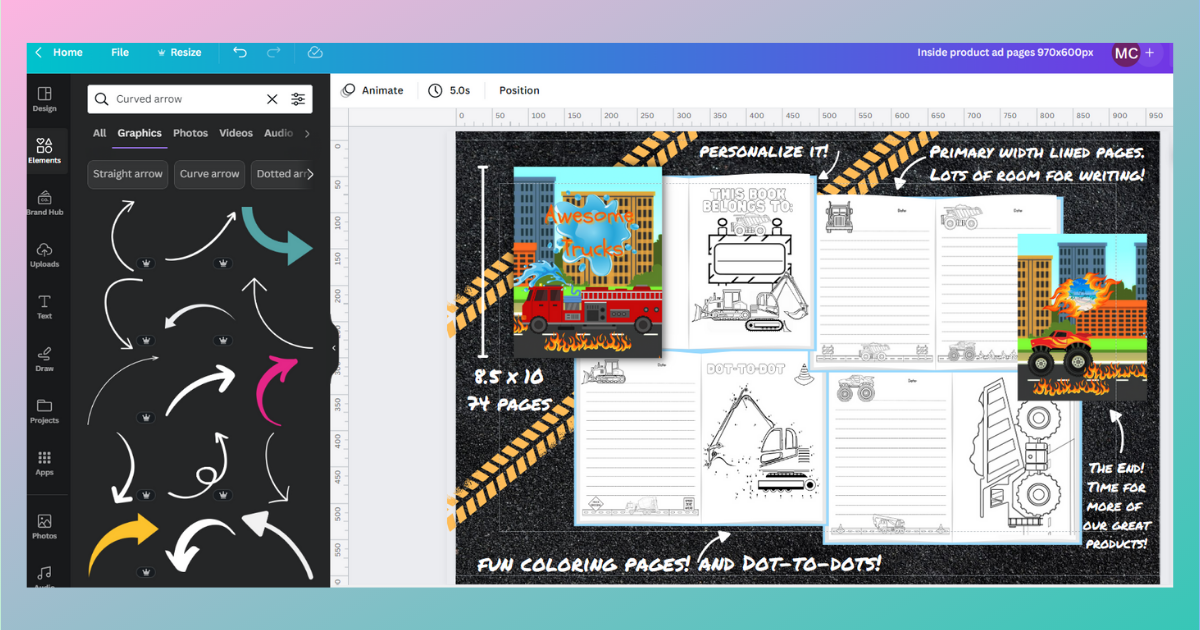
- If you would like to add arrows as I have above, you search those just like you did the frames in elements.
- When you are done with your design, or designs if you choose more than 1 module in step 2, go to the right-hand corner of the screen and click on share. You will want to download it as PNG. Now it’s ready for Amazon!
Step 5 Upload to Amazon’s A+ Content
Go to Amazon’s A+ Content Manager screen, you should have the empty modules you picked in Step 2. Click on the add photo or background image and find the design you just downloaded. It will ask you to describe your image for customers using screen reader applications. Write a short description using a keyword or two and click add. Depending on the module you choose, there may be a headline, footer, or overlay text. Fill those out if you want to use them. If you leave them blank, they will not show up on your final page.
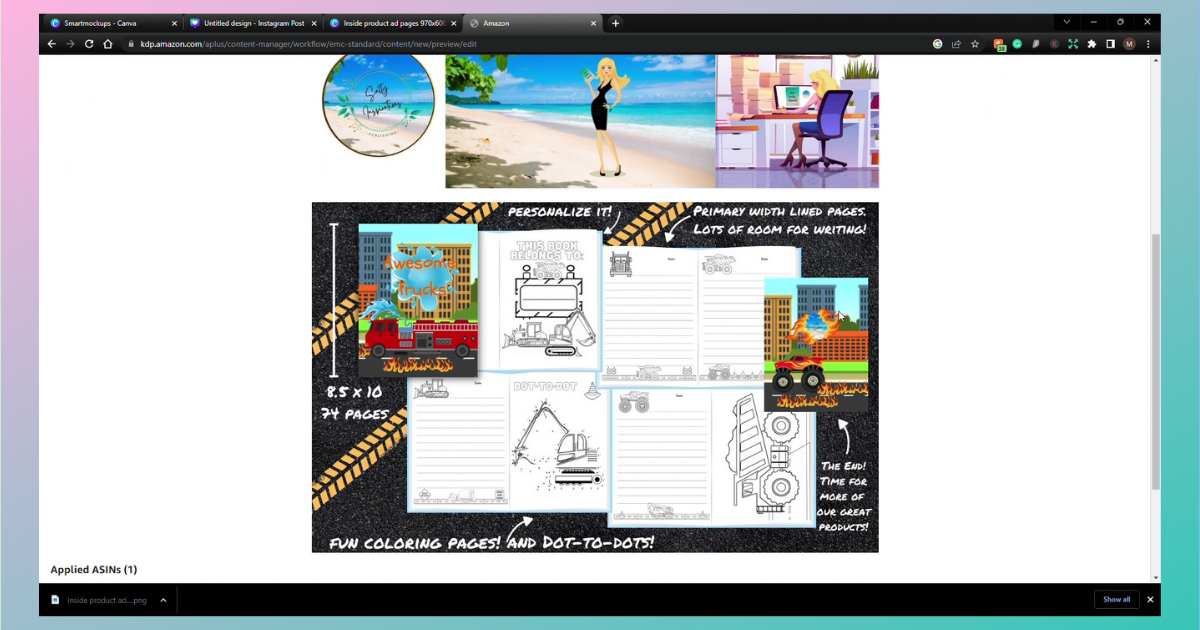
Scroll back up to the top and you will see a preview button, click it. Once everything looks good to you, click on the Next: Apply ASINs button top right.
Apply your book ASIN numbers. I find it’s easier to copy and paste them from your bookshelf than to try to use the search box. Once you see your book has appeared, go to the right side of your screen and click the blue box that says Apply content. In the upper right-hand corner, click the box Next: Review and submit.
That’s it! You have submitted your A+ Content! Once Amazon reviews it, they will post it to your book page or put it back in drafts if they would like you to correct it. They only ask for corrections if you are using phrases like, “see more of our products”, or if your images are blurry.
It takes a little bit of time to create these, but it is worth it if you want your customers to see what you are selling. The best way to learn is to play around in Canva. Create a few things for practice. I also created a business header. I put it at the top of each page to help with branding. I hope this helps, if you would like to watch the video click here. Follow us and leave me a comment.
If you are in need of some free promotional help! Read my 5 Free Tips For Promoting Your Low-Content Books
I have another in-depth post for A+ Content for your novels if you are an author as well. How to Create A+ Content on Amazon: A Step-by-Step Guide for Authors
The way to get started is to quit talking and begin doing. -Walt Disney
As always, thanks for stopping by for some Salty Inspirations!